

Shoe Commercial


Title: Sneaker Commercial
Programs: Houdini
Modeled: N/A
SIM: Houdini
Lighting: N/A
Texture: Houdini (Arnold)
Rendering: Arnold
Description:
A collaboration with the aim of designing, and creating multiple commercial variants with the hope of being bid to a company.
This page is dedicated to the work by Luke Vuilliomenet (LVFXStudios). However the project as a whole was a cumulative effort by all present.
***All work shown is used under the assumption as Work in Progress (WIP), and therefore cannot be taken as an accurate depiction of final deliverable until stated otherwise. 7/3/2020***
Team
Director: Kevin Mannens
Project Supervisor: Morgan Woodward
Editor: Paul Griswold
VFX Supervisor: Noah Catan
Lead FX Artist: Luke Vuilliomenet
FX Artist: Yanni Fong
FX Artist: Chen Tang
FX Artist: Junpeng Tang
Modeler: Wei Bin Ng
Environment Modeling & FX: Julie Krizan
Texture Artist: Wei Bin Ng
FX Textures: Respective FX Artist
Animator: Paul Griswold
Lead Lighter: Morgan Woodward
Lighter: Gavin Montgomery
Lead Compositor: Noah Catan
Compositor: Gavin Montgomery
Compositor: Wei Bin Ng
Render Manager: Morgan Woodward
Commercial Shot
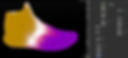
Test Renders
Render test of FX transition growth, and shader layering test.
Transition Test
Geo Prep

Unwanted attributes are deleted. Afterwards the mesh is subdivided for solver accuracy; while, a rest attribute is stored per points to be used later.
Scatter Points

Points are scattered into a desired area for the growth to begin.
Set Grow

Start points are selected from the scattered region. Afterwards the "grow" attribute is initialized.
Set Decay
The starting points are used to generate a region of points which are then fed to the high resolution scatter. The point wrangle uses "nearpoint" function to determine if the high resolution is a starting region or not.
Set Decay

Check if the high resolution is in a starting region or not. The points are then fed into a solver node to generate the growth effect utilizing a noise to create variance.
Output Growth Solve

The points are then colored based on the "grow" attribute. Which is then written out and used to drive different aspects of the transformation.
Transfer Grow

The grow attribute is transferred to the base shoe model (Dark blue). While an edge attribute is created by offsetting the grow solve forward in time and blasted to a specific value (Pink).
*Primitive groups are created using these values as guides*
Creating Paper Edge
Geo Prep

The geometry is cleaned by fusing any overlapping points. Afterwards the normal scale is adjusted, followed by moving the geometry inward along normal to rest inside of outer shoe geometry. The surface is then reduced for better pattern creation, sorted at random, and given a rest attribute.
Generate VDB

The random points in the "move" group are adjusted using soft peak, followed by adding noise to the geometry as a whole. The grow and edge attributes are then isolated and extruded so that a vdb can be generated. A wrangle is used to smooth the P position on the outer edge of the geo. Finally a vdb is generated, using a reshape on dilate to remove any messy intersections.
Creating Cardboard Interior
Remove Edge

Blast remove edge primitives. Create a rest attribute. Remove any points with no "grow" attribute", also remove any overlapping low value grow.
Check Edge

Check if any edge overlaps. If so blur attribute and create rest for position adjustment.
Create Corrugated Cardboard

Points on the inner layers are first removed as time goes on to prevent unneeded geometry. Depending on the layer being created the geometry is moved along its normal using the N vector or a sin wave. Once merged together the layers positions are adjusted if the "edge" attribute is detected and then VDB'd.
Combine Layers

The paper and cardboard layers are vdb combined, converted to polygons, and grouped.
Extra Pieces

The smaller pieces (Laces, logos, webbing, etc.) were unable to accurately generate the corrugated pattern; therefore, they were passed through a simplified system using the same techniques minus the movement along normal.
Shader Attributes

The different stages of the growth are used to attribute transfer a float value that will be used to generate the FX shaders.
Transfer UV + Name

In order to create clean accurate geometry a vdb was created; however, in doing so the UV attribute along with name attributes needed for texturing were lost from the original model. The original model was separated into individual parts, subdivided, and then passed the attributes over to the new FX model.
Final Extrusion

As the final shoe shader growth appears the model is slightly extruded along its normal and then the position is smooth between the original surface and the new edge.
Creating Fibers
Geo Prep

The provided model is subdivided to give a smoother outline. Then a vdb is generated to generate a large number of primitives. The remesh node is used to convert the quads into triangles and in doing so gives a more random placement. Noise is then generate to drive a poly reduction in certain areas so that there are longer and shorter segments. Finally primitives are removed at random using noise and a rand() vex function.
End Result:
Geometry containing an irregular placement of larger and smaller primitive edges with holes. Thus prevent straight paths to be fed into the "Find Shortest Path" node.
Find Shortest Path

The growth solve at different stages is taken from before and passed to the prepared path geo. By removing or not removing a value greater than or less than zero on grow gives predetermined start and end regions. Using a group by range node, start and end points are defined, and fed into the find shortest path node. Finally a resample is used to adjust the overall shape of the paths.
Create Primary Rest

Create a gradient based on number of points per primitive. Tell the points which primitive they exist on. Transfer the normal from the original shoe model. Move the point along its normal to be within the outer shell geometry, and define this as the starting restPath position.
Micro Fibers

Define a cross direction between normal and direction of curve. Noise is then added to this cross direction and point is moved based on this vector. The new position is then moved to a polywire surface from the scatter points of the original model. The points are mixed between the new position and the original rest position and stored in a new Micro rest.
Solver Rest

A similar process is taken for creating the solver rest (the position used to transfer any new information from the growth solver to fibers). Prior to the final ray the main rest attribute is created. At the end the new fibers are rayed to the actual surface of the original model.
Transformation Rest

Create new rest position on the inside of final FX transition model to prevent overlap. Then restore solver rest.
Transfer Solver Attributes
Transfer, shrink (blue underneath orange), micro (purple to red), transform (orange).
Shape Fibers

Shrink is used to adjust between the rest and solverRest positions. Micro then mixes between the newly created position and the microRest. Transform then mixes between the finished micro position and the needed transformRest.
At the same time a random pscale multiplier is generated for each fiber primitive. and is used along with a random pscale.
Create Mesh

Each fiber is animated using a carve node. Unnecessary attributes are deleted. A primTotal attribute is created. Afterwards a predefined shape containing uv's (left viewer, right side) is swept onto the fiber curves using pscale. The gradient and prim_num are promoted to vertex and used to proceduraly layout each fibers uv's.
Apply Animation

The base shoe and extra pieces are separated out and the animation is apply using a pointdeform node. This applies for all aspects, FX model and fibers.
Cardboard Shader Pt1

Noise and colors are mixed together using the attributes mentioned earlier to generate the shaders.
Cardboard Shader Pt2

Shader settings
Cardboard Shader Pt3

Shader displacement
Fiber Shader

Final Shaders

The final shoe shaders were created by Wei Bin Ng. The FX (cardboard and fiber) shaders were mixed with the final shaders using the same method to create a growing transition between the two.